Git basics
How to upload a project to GitHub without the command line
Put any project on GitHub without typing a Git command: turn the folder into a repository, make a first commit, then publish and push it from a free Git GUI. Notes for GitLab and Bitbucket are included.
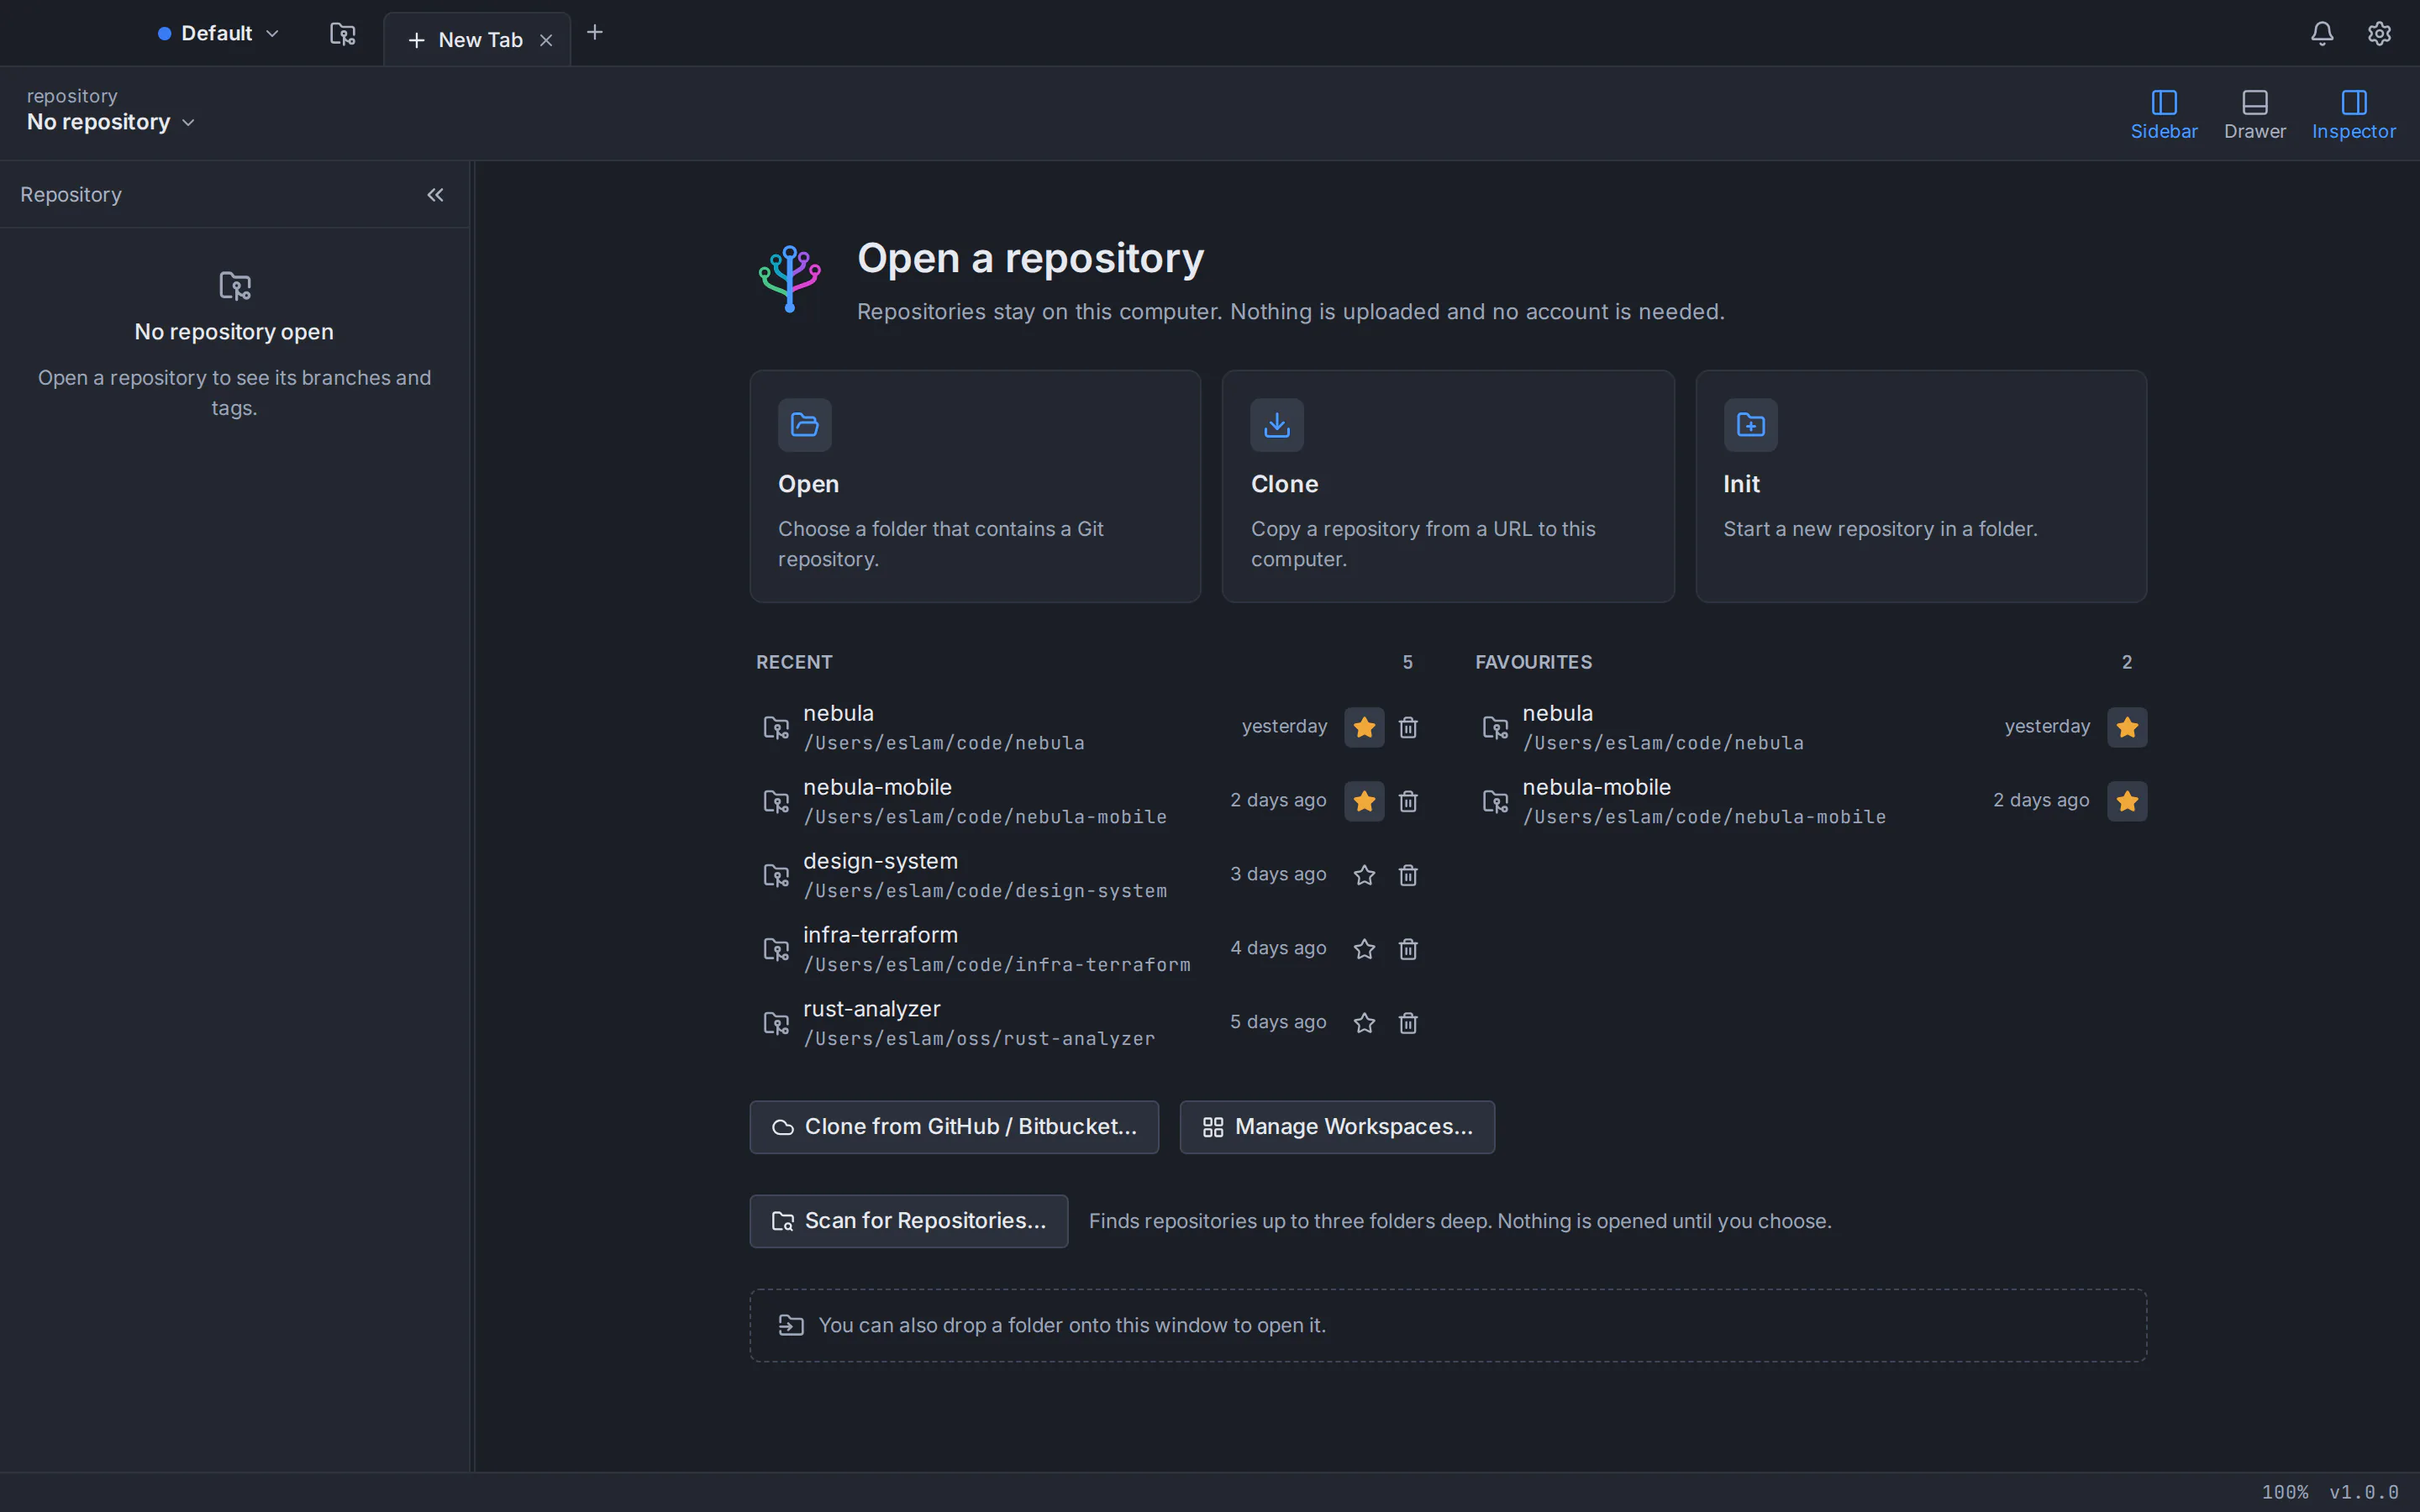
To upload a project to GitHub without the command line, install Git, open your project folder in a Git GUI and do three things: turn the folder into a Git repository, commit your files, then publish. Publishing creates an empty repository on your GitHub account, adds it as a remote and pushes your commits to it. In GitTree that last part is one dialog, Publish Repository…, so you never type git push, yet the result matches the commands, because the app runs your installed Git.
The steps work for any project: a React or Flutter app, a website, a Python script, even a thesis. The screenshots show GitTree, a free Git client for macOS, Windows and Linux; its maker wrote this guide. You will also find notes for existing repositories, GitLab and Bitbucket, plus fixes for common errors.
What you need before you upload code to GitHub
- A GitHub account. Sign up on github.com if you don’t have one yet.
- Git 2.39 or newer. GitTree uses the Git already on your computer instead of bundling its own: the Xcode Command Line Tools or Homebrew on macOS, Git for Windows on Windows, your package manager on Linux.
- Ubuntu 22.04 or Linux Mint 21? Their Git 2.34 is too old, so add
ppa:git-core/ppafirst, as our guide to upgrading Git on Ubuntu shows. - GitTree and a free GitTree account. Get the installer from the GitTree download page and sign in once. It is free today, private repositories included.
- Your project folder, new or old. It stays where it is.
Prepare your project: what not to upload to GitHub
Everything you commit becomes part of the history, and on a public repository anyone can read it. Decide what stays out before the first commit, with a .gitignore file in the project’s top folder. GitHub maintains recommended .gitignore files for common languages, and GitTree offers its own templates (Node, Python, Java, Go, Rust, .NET and more) when it creates the repository. Leave out:
- Dependencies and build output:
node_modules/,build/,dist/,.dart_tool/,__pycache__/and similar folders can be rebuilt from your source. - Secrets:
.envfiles, API keys, passwords and signing keys, from the very first commit. - Very large files: Git warns about files over 50 MiB, and GitHub blocks files over 100 MiB. Use Git LFS, which GitTree supports, or keep them out.
- System clutter such as
.DS_StoreandThumbs.dbfiles.
How to push a project to GitHub with GitTree, step by step
Initialize your project folder
Open a new tab, choose Init and pick your project folder as the Location. Keep main as the initial branch, choose a .gitignore template and choose Initialize.
Make the first commit
Check the list of changed files, choose Stage All Changes, type a summary such as “Initial commit” and choose the commit button.
Connect your GitHub account
Open Preferences, go to Integrations and choose Connect GitHub…, then sign in with your browser or use a personal access token.
Publish the repository
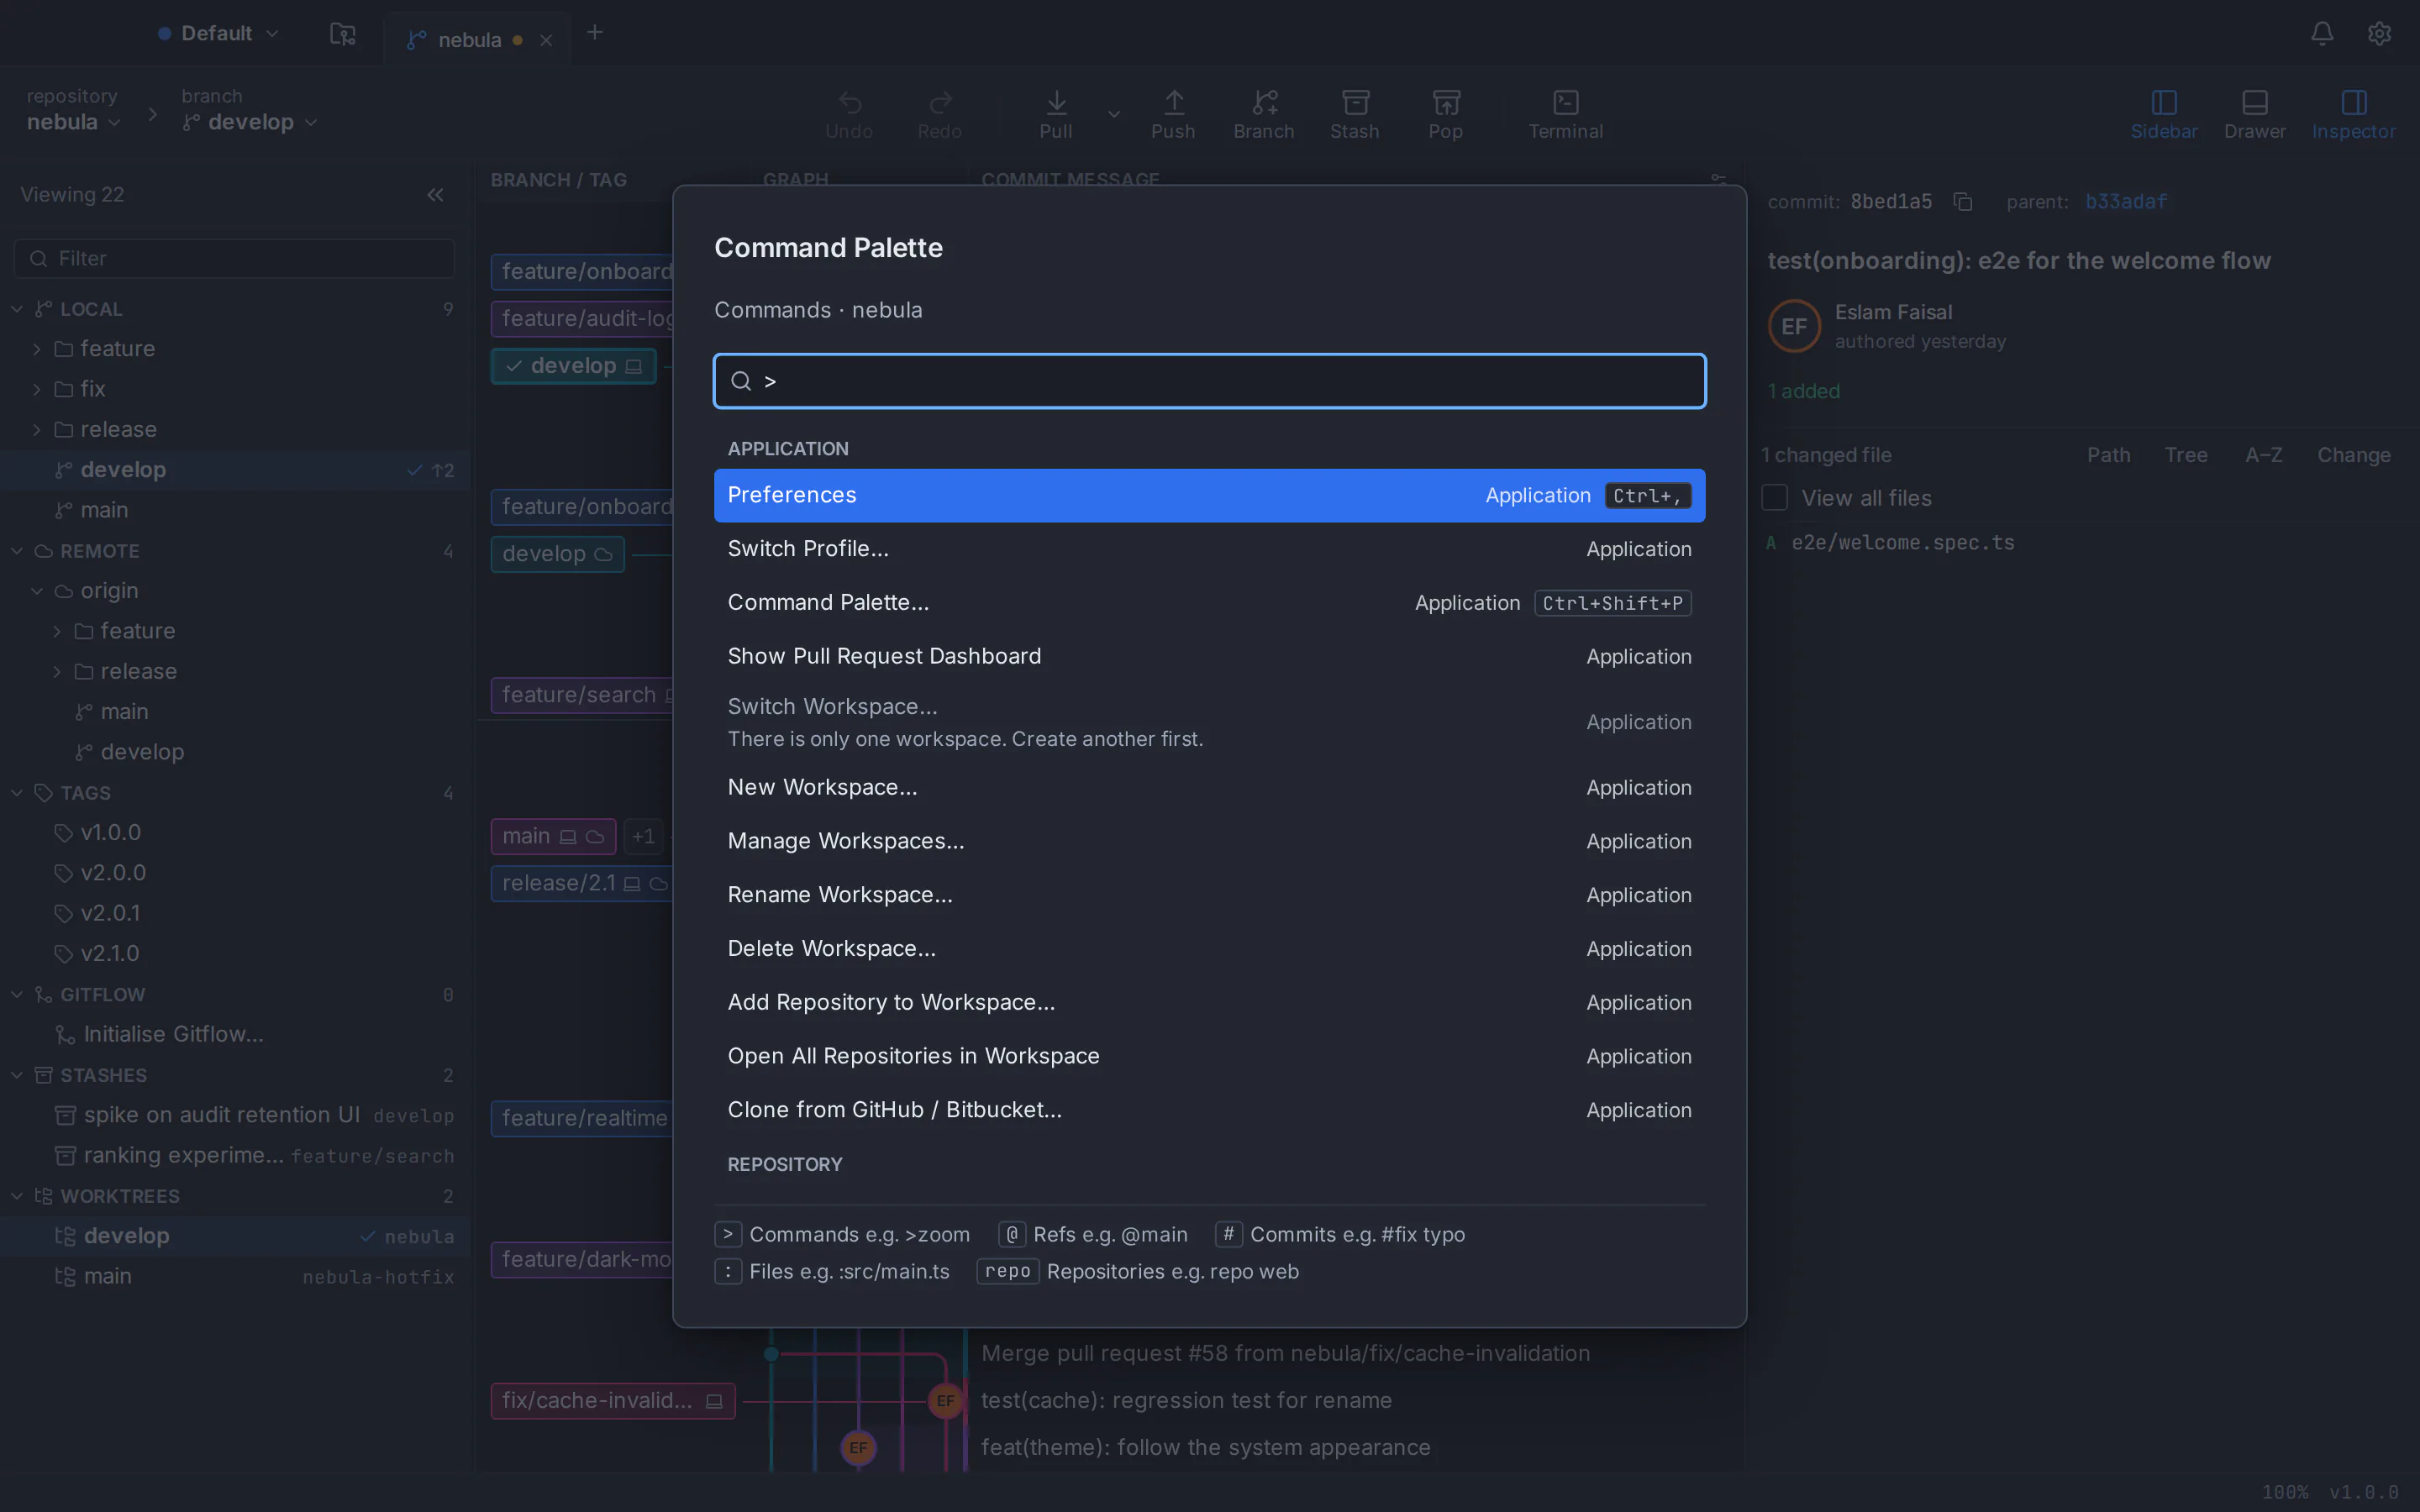
Run Publish Repository… from the command palette and check the name, which starts as the folder’s name. Private is ticked by default; untick it for a public repository, then choose Publish. GitTree creates it on GitHub, adds it as the origin remote and pushes your branch.
Check the result on GitHub
The sidebar now lists origin under Remote. Run View Repository on Remote from the command palette to see your files on GitHub.
Create a local Git repository from your project folder
A Git repository is an ordinary folder with a hidden .git folder inside, where Git keeps the history; your own files don’t change. In GitTree, open a new tab and choose Init. The Initialize a repository dialog asks for:
- Location: your project folder. GitTree creates the repository around the files already there.
- Initial branch: prefilled with
main, the name GitHub’s own instructions use. - .gitignore template and Licence: optional files written into the folder, uncommitted. A file that already exists is kept, never replaced.
- Open after creating: leave it ticked so the repository opens in a tab.
Opened the folder with Open instead? GitTree says it is not a Git repository yet and offers Initialize Repository…. New to these terms? Our Git for beginners guide explains repositories, commits and remotes in plain words.
Make your first commit
Your files now show as unstaged changes. Staging picks what goes into the next commit; for a first upload you want everything that isn’t ignored, so choose Stage All Changes. If node_modules or a .env file shows up in the list, choose Ignore from that file’s menu and GitTree adds it to .gitignore.
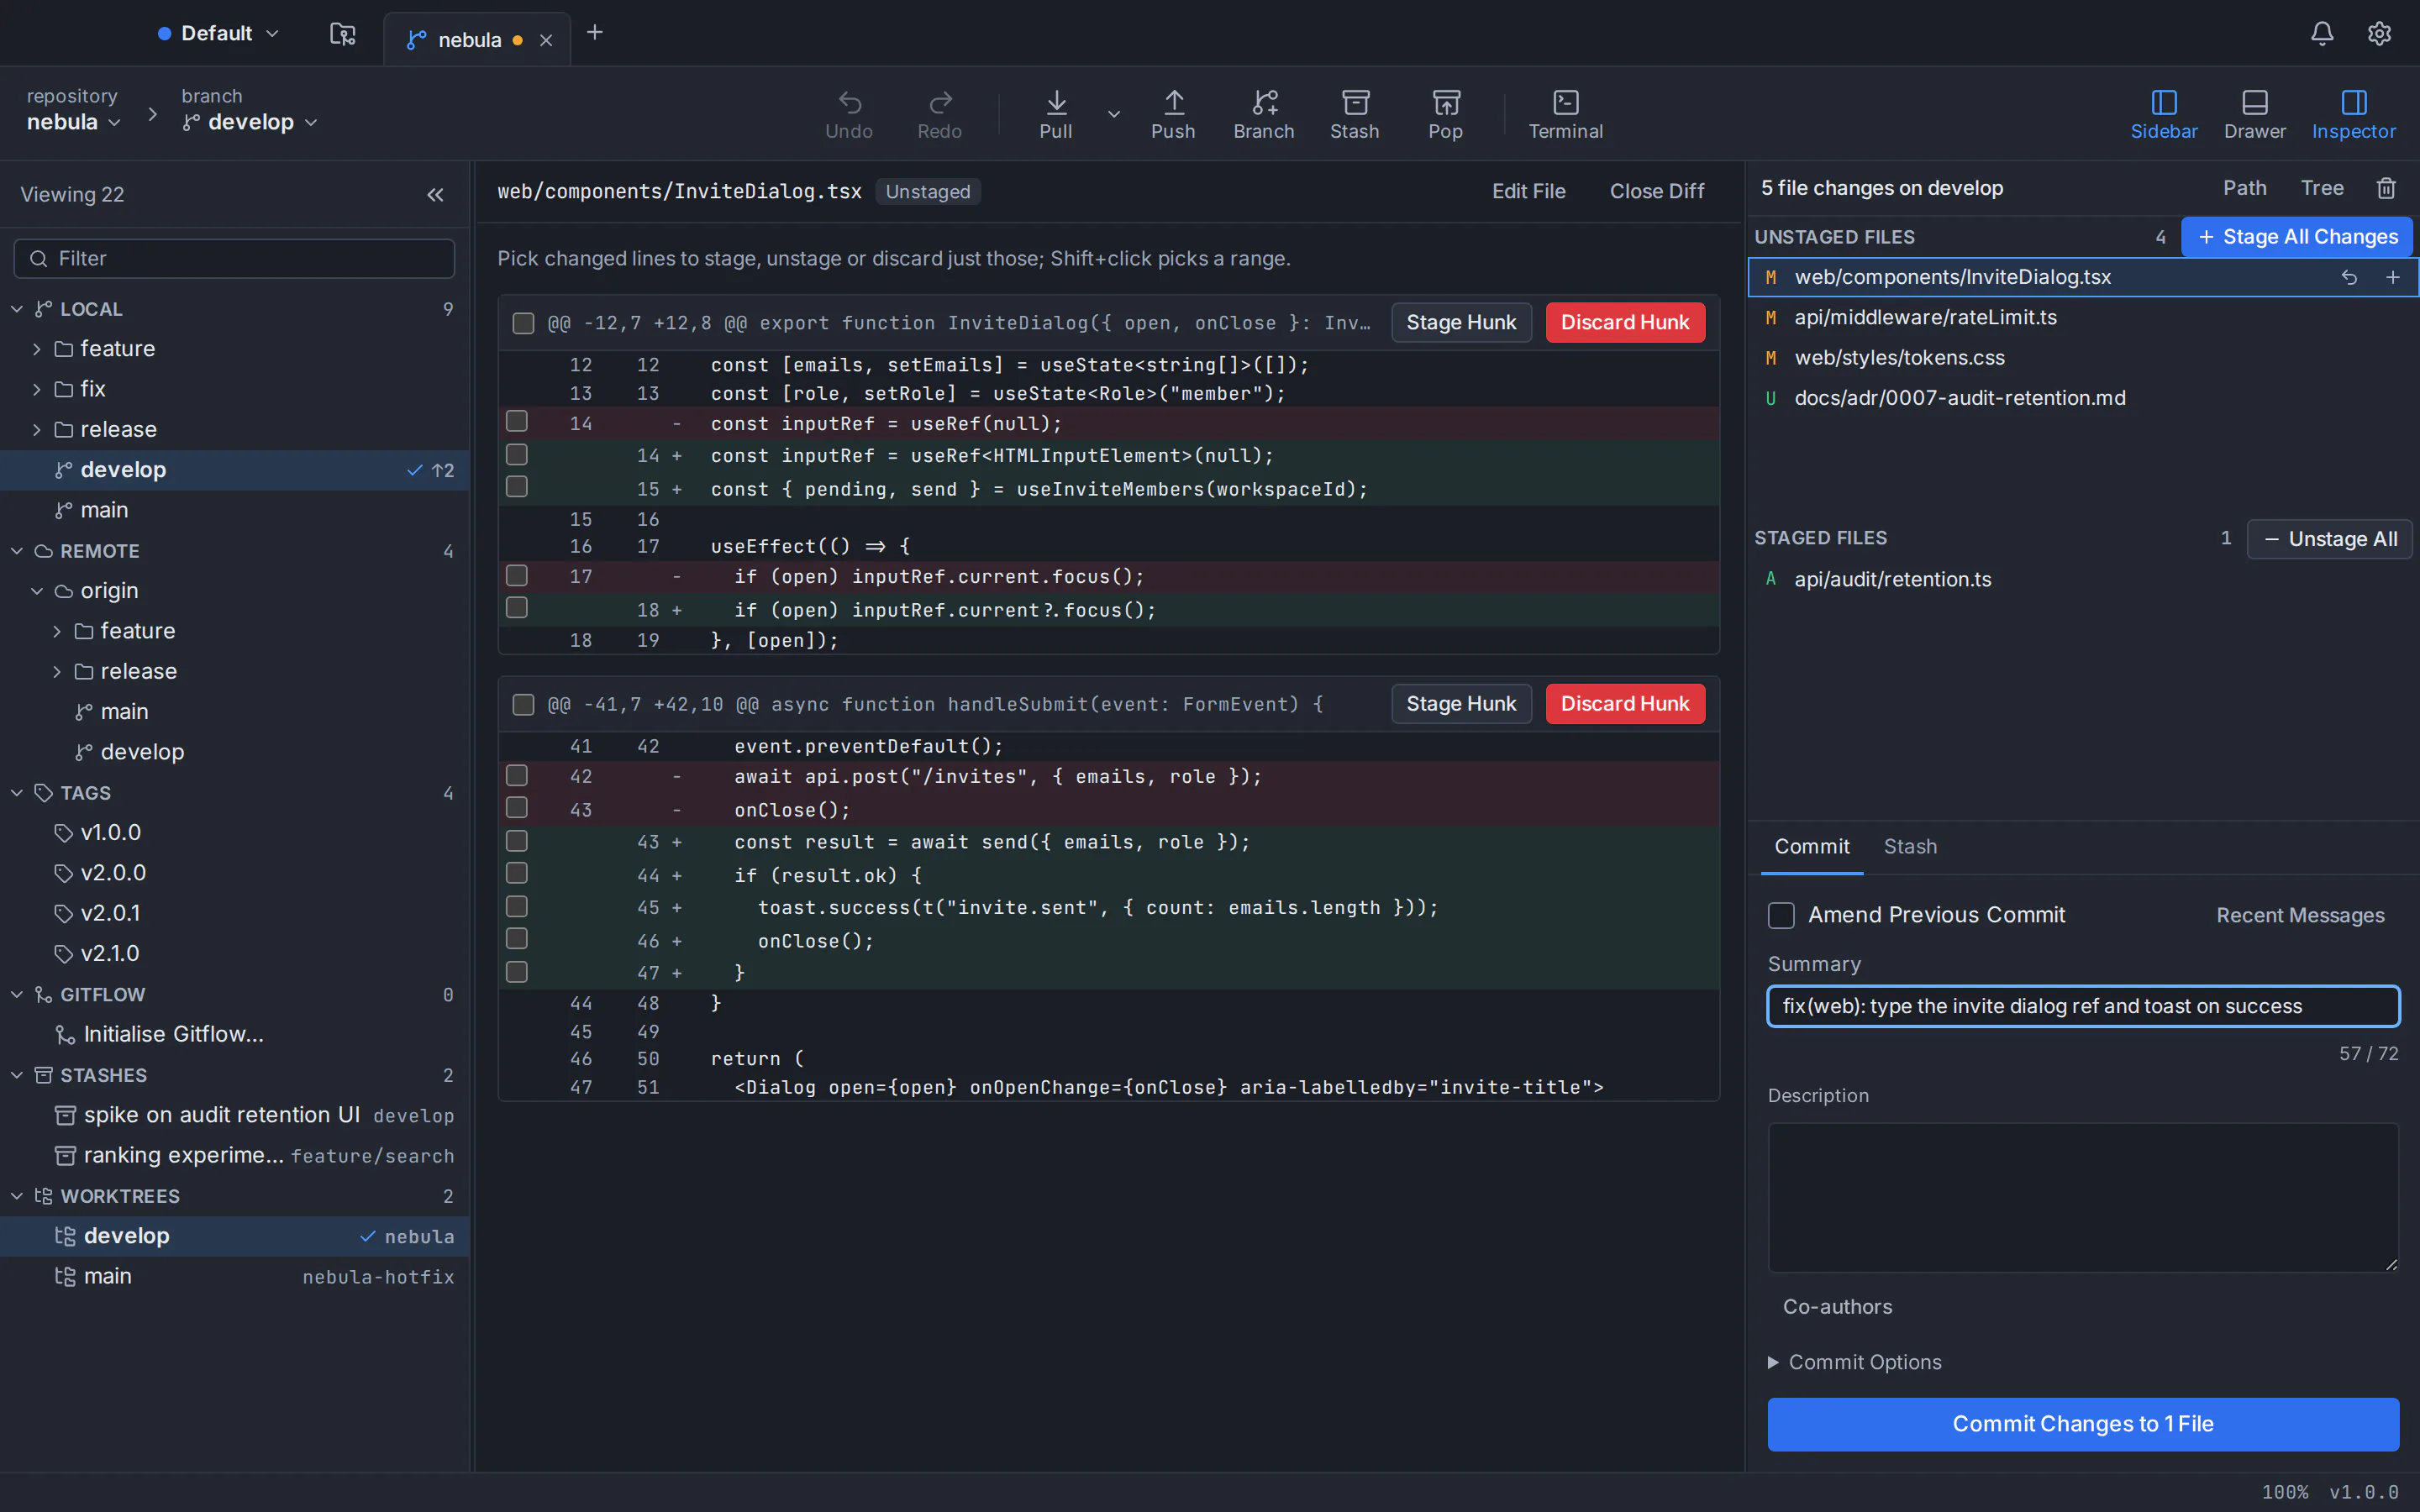
Type a summary such as Initial commit and choose the commit button. That saves the first snapshot locally; nothing has left your computer yet. GitTree can also draft the message with the Claude Code, Codex or Antigravity CLI you already use: see AI commit messages in GitTree.
Publish the repository to GitHub from the GUI
Connect your GitHub account
Open Preferences, go to Integrations and choose Connect GitHub…, then sign in with your browser or use a personal access token. Tokens are stored in your macOS Keychain, Windows Credential Manager or the Secret Service on Linux; the GitTree privacy policy explains what the app sends where. This is separate from your GitTree sign-in, so connect GitHub even if you signed in to GitTree with it.
Create the repository and push
Press Ctrl+Shift+P (⌘+Shift+P on a Mac) and run Publish Repository…; it is also in the menu of the sidebar’s Remote section. The dialog asks for:
- Account and Owner: you, or an organization you can create repositories in.
- Name and an optional Description: the name starts as your folder’s name and becomes part of the repository’s web address.
- Private: ticked by default, so only people you give access to can see the repository. Untick it to publish a public repository. You can change visibility later in the repository’s settings on GitHub.
- Remote name: prefilled with
origin, the usual name for a first remote. - Use SSH for the remote URL: leave it off to push over HTTPS, or tick it if you have an SSH key on GitHub. GitTree can generate a key, test it and upload it to GitHub.
Choose Publish. GitTree confirms the repository was published, and the sidebar’s Remote section lists origin with your branch: your project is on GitHub. Over HTTPS, a credential helper you already use answers first; if it has nothing, GitTree answers with the connected account.
Already created the repository on GitHub? Add it as a remote
That works too, as long as the repository is empty. GitHub’s own instructions say not to add a README, licence or .gitignore when you import an existing project, to avoid errors: those files become a commit on GitHub that your project doesn’t have, and Git rejects your first push. Then:
- On GitHub, copy the repository’s HTTPS or SSH URL.
- In GitTree, open the menu of the sidebar’s Remote section and choose Add Remote…. Name it
origin, paste the URL and choose Add Remote. - Choose Push in the toolbar. The first push also sets the upstream for later pushes and pulls.
Ticked the README box anyway? Clone the new repository with GitTree, copy your project files (without any .git folder) into the clone, then commit and push.
Upload a project to GitLab or Bitbucket instead
The same moves work on any Git host. Publish Repository… lists every connected account that can create repositories, so connect your GitLab, Bitbucket or Azure DevOps account under Integrations and publish the same way. GitLab and Azure DevOps support is new in GitTree, so the manual route below is a handy fallback.
GitLab
On GitLab a repository belongs to a project. Create a blank project without a README, copy its clone URL and add it in GitTree with Add Remote…. There is a shortcut: if you may create projects in a namespace, pushing to a new path that was never used before creates a private project. Add a remote such as https://gitlab.com/your-name/my-project.git and choose Push.
Bitbucket
On Bitbucket Cloud, choose Create, then Repository, pick the workspace and project and answer No to Include a README?. Copy the URL shown next to the git clone command, add it with Add Remote… and push. Bitbucket needs credentials over HTTPS or a key over SSH: connect your Bitbucket account in GitTree, or generate an SSH key in GitTree and upload it.
Why not just upload files on the GitHub website?
Dragging files into the browser is fine for a few small files. For a project you keep working on, pushing with Git wins:
| Question | GitHub website upload | Push from a Git GUI |
|---|---|---|
| Largest file | 25 MiB per file | 100 MiB per file (GitHub’s limit); larger files through Git LFS |
| Files at once | Up to 100 per upload | The whole project in one push |
| History on your computer | None: it lives only on GitHub | The full history, available offline |
| Updating later | Upload the changed files again by hand | Commit and push only what changed |
| Ignoring files | You leave files out by hand every time | .gitignore keeps them out automatically |
| Commands to type | None | None |
The same steps as Git commands
Because GitTree runs your installed Git, each step matches a command. Here is the command-line version from GitHub’s instructions for adding an existing project, with your own URL in place of the example:
git init -b main
git add .
git commit -m "Initial commit"
git remote add origin https://github.com/your-name/my-project.git
git push -u origin main
The -u option sets the upstream, as the first Push in GitTree does. For a day-to-day comparison, read Git GUI vs command line; if Git and GitHub still feel like one thing, Git vs GitHub untangles them.
Fixing common problems when you push to GitHub
- “GitTree needs Git” or “This Git is too old”: install Git 2.39 or newer (Git for Windows on Windows), then choose Check again.
- “Nowhere to push”: the repository has no remote yet. Run Publish Repository… or Add Remote….
- GitHub rejects your password: GitHub no longer accepts account passwords for Git. Connect your GitHub account in GitTree, enter a personal access token instead of the password, or use SSH.
- Push rejected because GitHub has commits you don’t: the repository was created with a README or licence. Use the clone-and-copy fix above.
- A file is too large: GitHub refuses the whole push. Undo can’t take back a repository’s very first commit, so amend it instead: move the file out of the project folder, stage the deletion, tick Amend Previous Commit and commit. Put the file back, choose Ignore from its menu (or track it with Git LFS) and push again. For a later commit, our guide to undoing a commit, reset or rebase explains Undo.
After the first upload: pushing new changes
From now on: edit, stage, commit with a clear summary and choose Push. Tick Push After Commit in the commit options to do both in one click. GitTree also fetches in the background, so commits others push show on the graph before you pull.
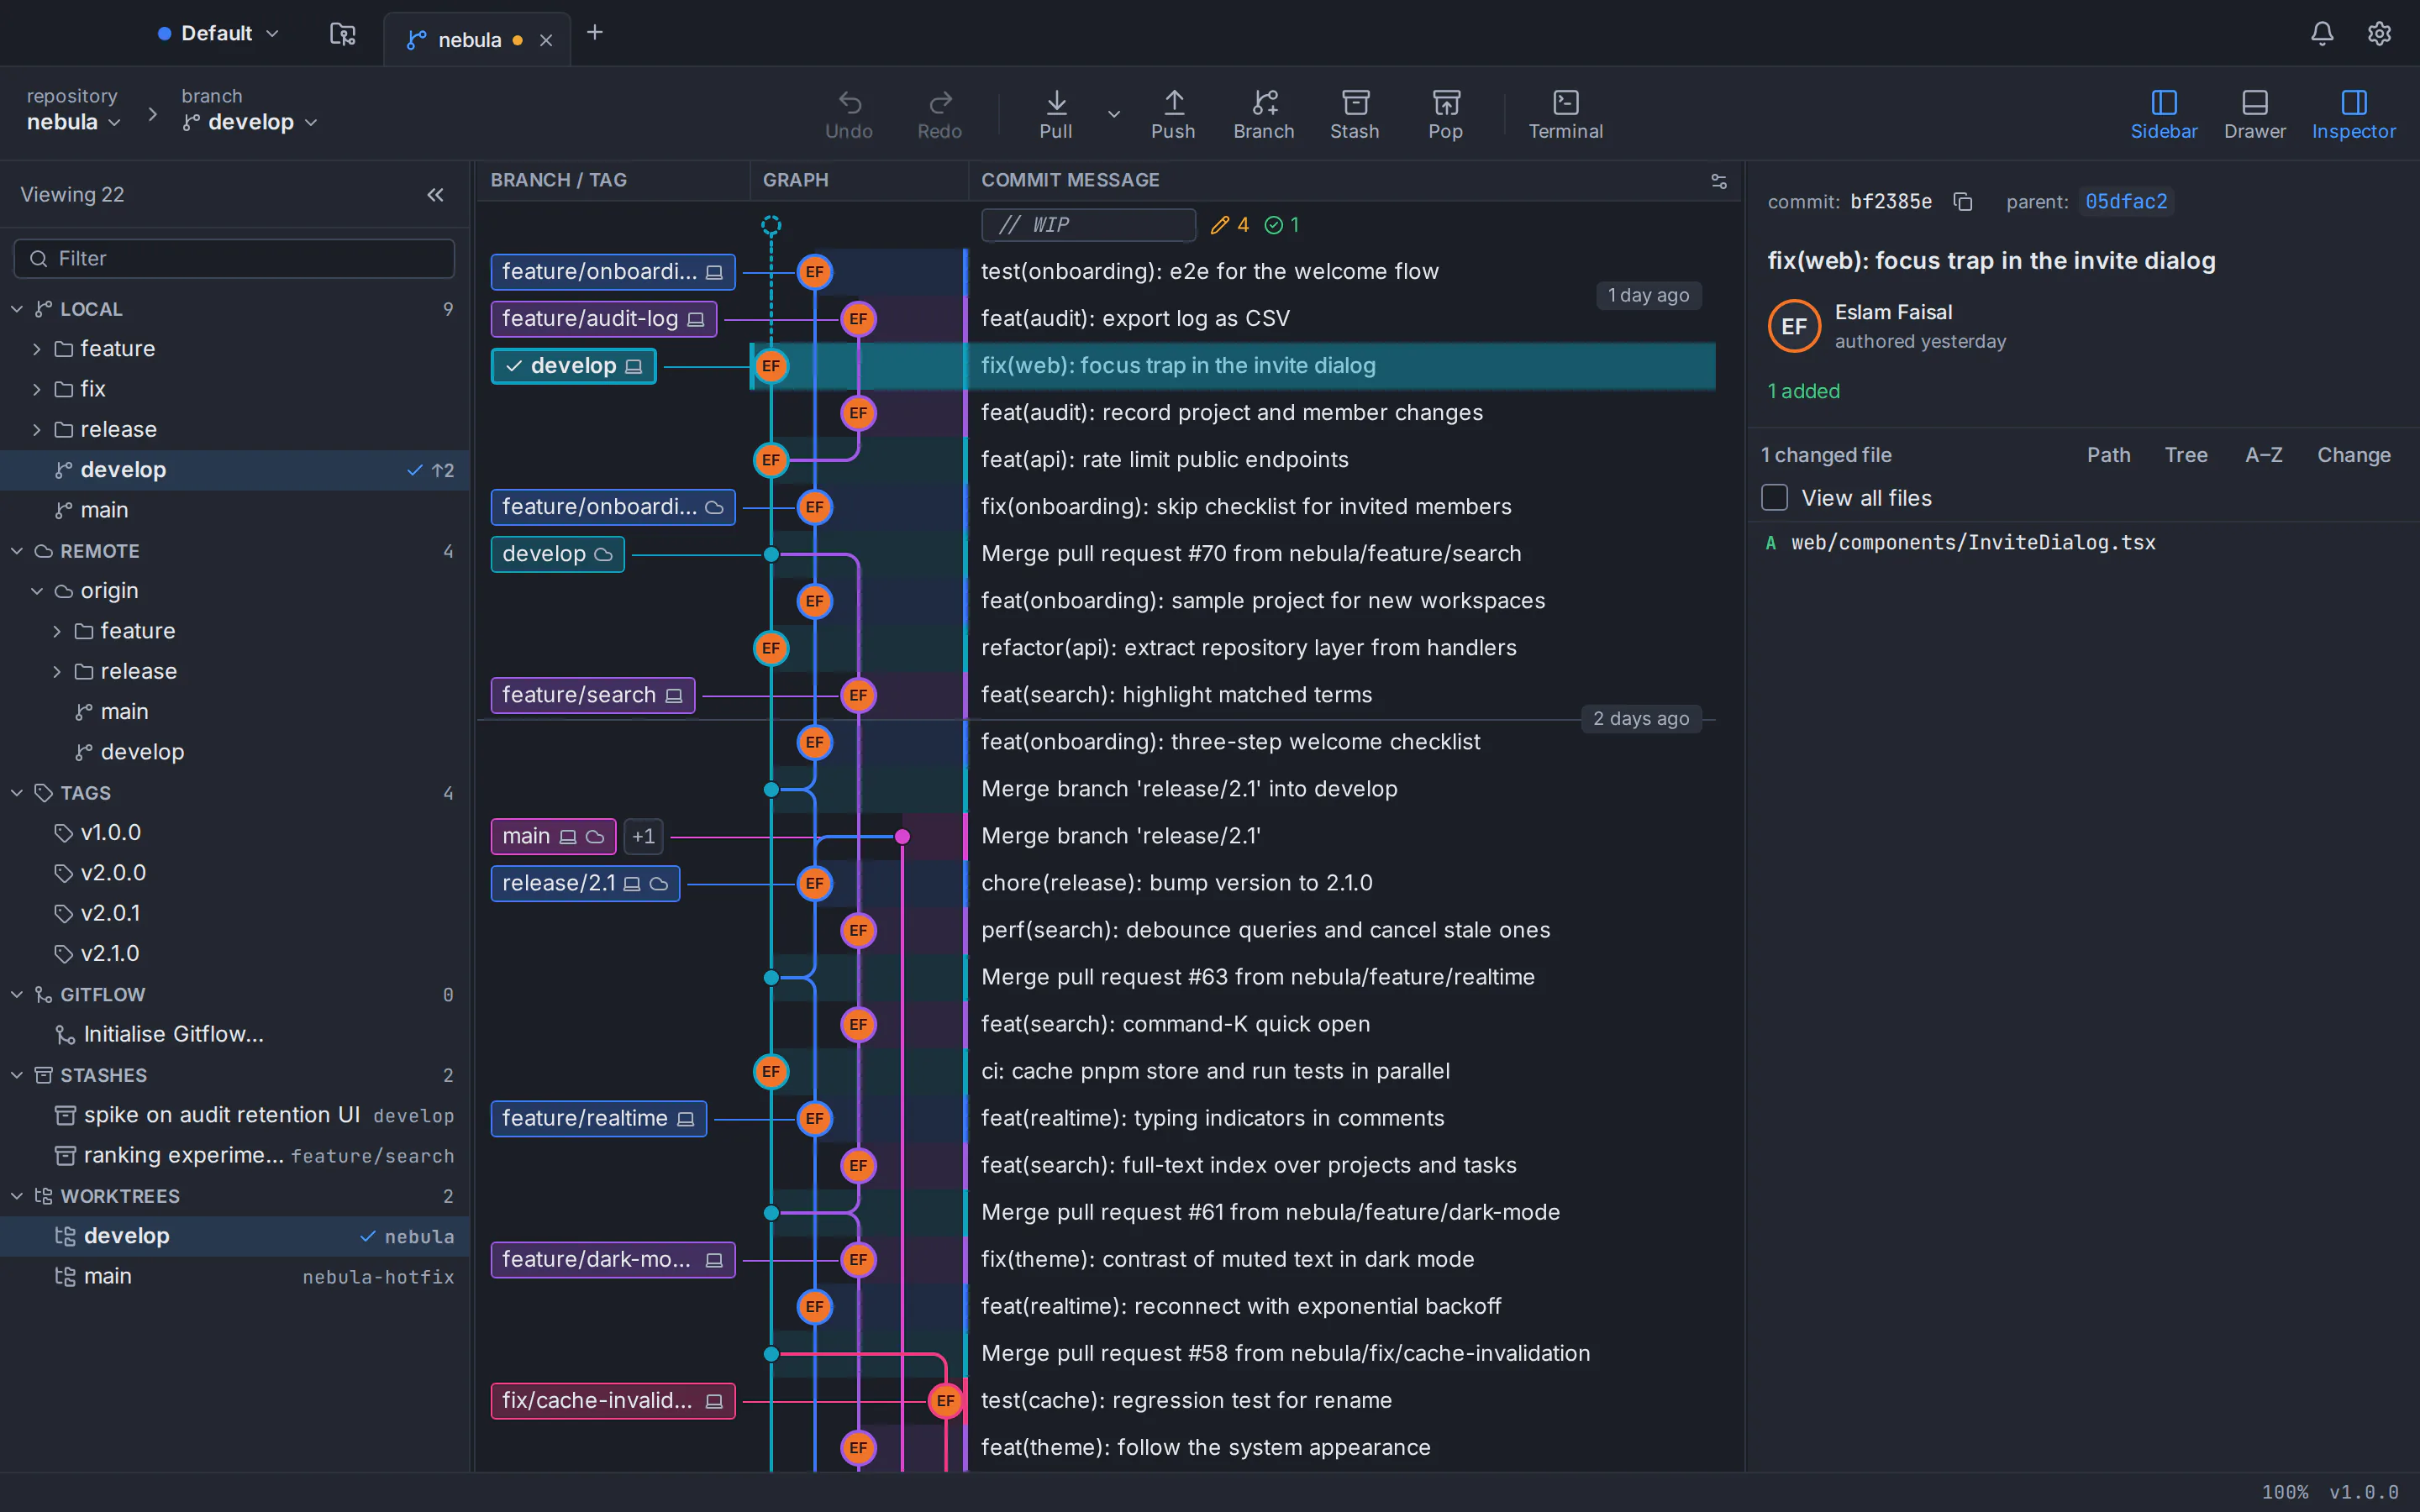
Ready to try it? GitTree is free today for macOS, Windows and Linux, private repositories included. It needs a free GitTree account and Git 2.39 or newer.
Stuck on a step? The GitTree support page lists every way to reach us, by e-mail or on GitHub.
Frequently asked questions
How do I upload a project to GitHub without the command line?
Install Git and a Git GUI, open your project folder and initialize it as a repository. Stage all the files and make a first commit. Then connect your GitHub account and publish: in GitTree, Publish Repository… creates the GitHub repository, adds it as a remote and pushes your branch, with no typed commands.
Can I upload a project folder to GitHub without installing Git?
Yes, by dragging files or folders onto the upload page of an existing repository on the GitHub website. Browser uploads are limited to 25 MiB per file and 100 files at a time, and you keep no history on your computer, so every later change means uploading again. For an ongoing project, Git is better.
Should I add a README when I create the repository on GitHub?
Not if you are uploading an existing project. GitHub advises creating the repository without a README, licence or .gitignore to avoid errors: those files form a first commit your project doesn’t have, so Git rejects your push. Push your project first, then add a README in a new commit. Publishing from GitTree creates an empty repository, so the problem never comes up.
Why does GitHub reject my password when I push?
GitHub removed password authentication for Git operations. Over HTTPS, enter a personal access token where Git asks for a password, or push over SSH with a key added to your GitHub account. In GitTree, a GitHub account connected under Preferences, Integrations answers for you when no other credential helper does.
Will my GitHub repository be public or private?
You choose. GitHub repositories can be public or private, and the GitTree publish dialog has a Private checkbox, ticked by default. If you are unsure, stay private: you can change the visibility later in the repository’s settings on GitHub. Commit author names and emails are visible to anyone who can see the repository.
How do I push changes after the first upload?
Edit your files, then stage the changes in GitTree, write a short summary and commit. Choose Push to send the new commits to GitHub; only what changed is uploaded. With Push After Commit ticked in the commit options, GitTree pushes right after each commit, to the upstream your first push set.
Does this work for GitLab and Bitbucket too?
Yes. Publish Repository… works with any connected account that can create repositories, including GitLab and Bitbucket. You can also create an empty repository on the website, add its URL as a remote in GitTree and push. GitLab even creates a private project for you when you push to a new project path.
Is GitTree free, and what does it need?
GitTree is free today for individuals and organizations, private repositories included. It runs on macOS 13 or later, 64-bit Windows 10 and 11, and 64-bit Linux, needs a free GitTree account to sign in, and uses the Git already installed on your computer, version 2.39 or newer. It is not open source.
Sources
Claims about other products were checked against their official pages on October 6, 2026. Prices and features change; the vendors’ pages are the source of truth.
- GitHub Docs: Adding locally hosted code to GitHub
- GitHub Docs: Creating a new repository
- GitHub Docs: Setting repository visibility
- GitHub Docs: About large files on GitHub
- GitHub Docs: Adding a file to a repository (browser uploads)
- GitHub Docs: About remote repositories (HTTPS, SSH and tokens)
- GitHub Docs: Ignoring files
- GitHub Docs: Removing sensitive data from a repository
- GitHub Docs: Setting your commit email address
- GitLab Docs: Create a project with git push
- GitLab Docs: Create a project
- Bitbucket Cloud: Create a repository in Bitbucket Cloud
- Bitbucket Cloud: Add unversioned code to a repository